
Should tradies share more progress shots or finished work?
Lead with the finished result, then use before and progress photos to explain the work behind it. Here’s how to choose a useful mix for your trade.
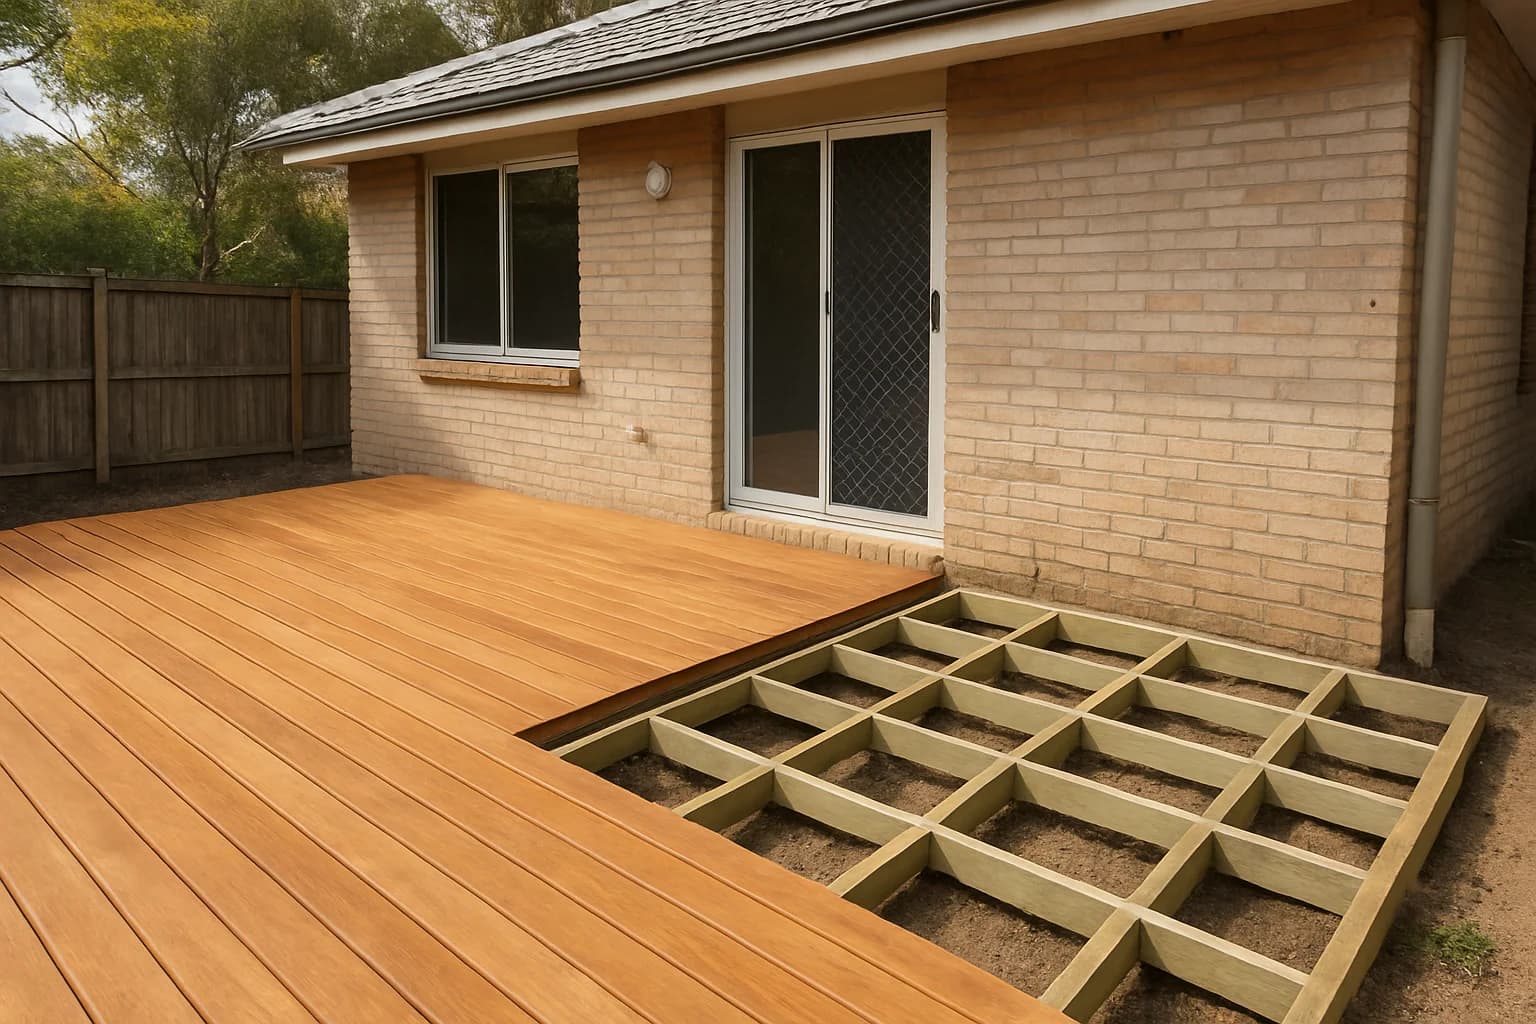
For most tradies, a sensible starting point is to post finished-project photos more often, then use before and progress shots to explain what changed and how you approached it. If your best work disappears behind walls or under a finished surface, give progress photos more space. That is a practical editorial recommendation, not a proven formula for building trust faster or winning more enquiries.
The real question is what a customer can understand from the picture. A finished deck shows the result. A preparation shot lets you explain work that the finished view cannot show. Before and after photos connect the starting problem with the outcome, provided the comparison is fair.
What does each type of photo help you explain?
Here, “job photos” means work-in-progress shots, rather than every photo taken on site. Choose each image to answer a customer’s question, not simply to prove you were busy.
| Photo type | Question to answer | Suggested use |
|---|---|---|
| Before photo | What needed changing? | Pair a worn fence or tired room with its finished result. |
| Progress photo | What went into the job? | Explain preparation, protection or a detail later covered up. |
| Finished-project photo | What does your completed work look like? | Lead with a clear view of the finished fence, room or installation. |
| Before-and-after pair | What difference did the work make? | Compare the same area from a similar position. |
Australian Government guidance on social media for business says social media can help build brand loyalty and trust, and recommends visual content over plain text. It does not establish which of these photo types builds trust fastest.
Treat your photos as evidence of the particular job, not proof of everything about your business. A neat finish alone does not establish compliance, durability or a hidden technical outcome.
Which photos deserve more space for your trade?
Use this decision aid before choosing your next post:
- Is the visible finish what you want to sell? For painting, landscaping, tiling and decorative carpentry, start with more finished views and before-and-after comparisons.
- Will the useful detail disappear? For plumbing, electrical, HVAC and building work, consider more progress photos with plain-English explanations. Only photograph from a safe position without interrupting the work.
- Is the job mainly a repair? Show the problem and completed repair where they are visible. Explain what you did without claiming a photo demonstrates testing or performance.
- Is the project still underway? Share a meaningful milestone and clearly label it as work in progress. Do not present it as the completed job.
These are starting choices, not rankings of which trades benefit most. Even a highly visual trade can use a preparation photo to explain its approach. Equally, a plumber can share a strong finished installation photo without turning every post into a technical lesson.
If an image needs a long explanation before anyone knows what they are looking at, consider a wider view or a simpler subject.
How often should you post each type?
Start with a manageable experiment: across your next four posts, use two finished-job posts, one before-and-after comparison and one progress explanation. That makes completed work the main focus without hiding the process.
For work that is largely concealed on completion, swap one finished-job post for another useful progress explanation. This is a suggested content mix, not an official posting ratio or platform requirement.
Choose a schedule you can maintain without interrupting paid work. Do not publish four posts from one job just to meet the mix if only one has something useful to say.
Keep a simple manual record of the photo type, subject and genuine enquiries that mention the post. Ask new callers what prompted them to get in touch. Use those answers to adjust your mix, while recognising that a small sample will not prove one format caused more leads.
How many photos should you take, and in what order?
Aim to capture a small set rather than dozens of near-identical shots:
- Before: take a wide view of the area before work starts.
- Progress: capture one meaningful stage when it is safe and appropriate.
- After: return to roughly the same position and camera height.
- Detail: photograph one finished feature worth explaining.
You do not need to publish every image. For a finished-project social post, try the after photo first, followed by the before view and one relevant detail. For an educational post, lead with the progress shot and explain what the reader should notice.
Within a side-by-side comparison, keep before on the left and after on the right, with clear labels in the accompanying copy. Keep the framing and lighting as consistent as reasonably possible. Avoid making the “before” deliberately gloomy or cropping away defects in the “after”.
A good after shot should show the work clearly: a useful wide view, a straight frame and enough surrounding context to understand the result. Clear away your tools and job waste when safe, but do not rearrange a customer’s belongings without permission.
What should the caption say?
Use a simple structure: the brief, the work, the result and a relevant next step. Describe what actually happened rather than adding unsupported claims such as “maintenance-free” or “guaranteed to last”.
Hypothetical example: a painter sharing a lounge room repaint.
“Lounge room repaint, from a dark feature wall to a lighter finish. We protected the flooring and patched surface marks before painting. The second photo shows the starting point, and the third shows preparation. Planning a similar repaint? Tell us which rooms you have in mind.”
Only use details that are true for your job. Add a broad service area if appropriate, not the customer’s address.
For a progress caption, explain why you chose to show that stage. For an after-only post, name the scope so readers do not assume you completed other work visible in the photo. Skip customer praise unless you have a genuine, authorised quote.
Should you use the same photos on social, your website and Google?
You can select from the same job photo set, but give each use a clear purpose.
For social posts, focus on one result or lesson at a time. For a website project page, consider a fuller sequence: the brief, starting condition, selected progress detail and completed result. Keep the explanation proportionate to the job.
For Google Business Profile, keep a clear, lightly edited version of your job photos. As of October 2026, Google’s Business Profile photo guidance says photos look best when they are in focus, well lit and have no significant alterations or excessive filters. Google also says uploaded media must follow its guidelines and content policy and is reviewed before going live.
That guidance is not a ranking of progress versus finished photos. Choose images that honestly represent your services rather than assuming either format will improve your search position.
What should you check before posting?
Run through this short checklist:
- Get permission to photograph and publicly share the job, and respect customer or site restrictions.
- Check for faces, addresses, number plates, paperwork, keys and security details. Choose another image if sensitive details cannot be excluded.
- Confirm that both comparison photos show the same job and that your caption accurately identifies its stage.
- Check the background for distracting waste or unsafe-looking situations. Fix the underlying issue where appropriate, rather than disguising it for marketing.
- Use your own authorised job photos, and do not present generated or heavily altered work as a real completed project.
These are practical precautions, not a statement of every privacy or site-access obligation. This is general marketing information, not legal advice.
Where does TradiesPost fit?
TradiesPost’s Create from Job Photos feature turns uploaded completed-job photos into branded social posts with AI captions and multiple design options. Its broader creation workflow also accepts your own job photos, so you can use progress shots as well as finished views. See the TradiesPost photo-to-post features.
Keep the original evidence honest and review the caption, scope and design before publishing. The TradiesPost workflow is worth considering when you want help turning your photo set into posts; a phone album and manual posting may be enough if you only share occasionally.
If you want help turning both progress shots and finished work into your next posts, get started with TradiesPost.
Frequently asked questions
Should tradies post before photos?+
Yes, when they help explain the work. Pair them with an after photo or clearly label the job as underway. Use comparable framing and avoid embarrassing the customer or revealing private details.
Are finished-project photos enough?+
They are a sensible starting point for showing visible results. Add a progress photo when you want to explain preparation or work that disappears beneath the finished surface.
Do before-and-after posts get more leads?+
The official sources supplied for this guide do not establish that before-and-after posts generate more leads than progress or finished-only photos. Track genuine enquiries and ask customers what prompted them to contact you rather than assuming a particular format wins.
How many photos should I take per job?+
A useful starting set is one before view, one meaningful progress shot, one matching after view and one finished detail. This is a practical checklist, not a platform requirement, and you do not need to publish all four.
What makes a good finished-project photo?+
Aim for a clear, well-lit view that shows the completed work in context. Use a similar position to the before shot if you are making a comparison, and avoid edits that misrepresent the result.
About the author
StitchedUp TeamEditorial team
Practical guides for Australian tradies on quoting, getting paid, winning work and running the business side.
How we research and review articlesTradiesPost
Your social media, sorted in 10 minutes